Knowledgebase
  • Welcome!
  • Threats
    • Software
      • Malware
      • Ransomware
      • Macros
    • Hardware
      • Flipper Zero
        • Firmware
          • 🐬flipperzero
            • Getting Started
          • 🐬flipper-xtreme
            • Wiki
              • Key Combos
              • Generic Guides
              • iButton key file format
              • SubGhz
              • How to add new SubGHz frequencies
              • Sub-GHz Remote
              • LF RFID key file format
              • NFC Flipper File Formats
              • Infrared Flipper File Formats
              • BadKB
              • Asset Packs
              • Unit tests
              • OTA Updates
              • How To Build
              • Hardware Targets
              • Flipper Build Tool
              • FAP (Flipper Application Package)
              • Flipper Application Manifests (.fam)
          • 🐬roguemaster
          • 🐬unleashed
    • Human
      • Advanced Persistent Threats (APTs)
      • Social engineering
      • Phishing
      • Typosquatting
    • Disinformation
      • Black Propaganda
      • White Propaganda
      • Grey Propaganda
      • Info Warfare
      • Political Warfare
      • Astroturfing
      • Greenwashing
      • Bluewashing
      • Whisper Campaigns
      • Push Polling
      • "Joe Jobs"
      • False Flags
      • Deep Fakes
  • About
    • Ports
      • 20
      • 21
      • 22
      • 23
      • 25
      • 587
      • 2323
      • 53
      • 80
      • 194
  • Tools
    • Radio Frequency & SubGHZ
      • gnuradio
      • hackrf
    • Digital Forensics
      • afflib
    • Reverse Engineering
      • binwalk
      • radare2
    • Hardware & Virtualization
      • qemu
      • freerdp2
      • util-linux
      • lvm2
    • VPN Providers
      • ProtonVPN
      • NordVPN
      • ExpressVPN
      • Surfshark
      • CyberGhost
      • Private Internet Access
    • Database, Cloud, & Firewalls
      • sqlmap
      • cewl
      • gobuster
      • fwbuilder
      • clamav
    • Enumeration & Lists
      • crunch
      • aflplusplus
      • ffuf
      • maltego
        • maltego-teeth
      • getallurls
    • Penetration Testing
      • beef-xss
      • wifite
      • burpsuite
      • metasploit-framework
    • Passwords & Auth
      • john
      • hashcat
      • hydra
      • cryptsetup
    • Surface Intelligence
      • theharvester
      • subfinder
      • dsniff
      • dnsrecon
      • dirb
      • nikto
      • legion
      • spiderfoot
    • Networks & Wireless
      • nmap
      • impacket-scripts
      • tcpdump
      • traceroute
      • wireshark
      • responder
      • aircrack-ng
      • netcat
      • kismet
      • ubertooth
      • routersploit
      • apache2
      • ettercap
      • bettercap
      • bettercap-ui
      • freeradius
      • bind9
      • samba
      • net-snmp
      • tcpreplay
    • Social Media
      • sherlock
    • Miscellaneous
      • git
      • libnfc
      • llvm-defaults
  • Operating Systems
    • Ubuntu
      • Installation
        • Switching
          • From Windows
          • From macOS
          • From a different Linux
        • Applications
        • Ubuntu PreInstalled
    • Linux Mint
      • Installation Guide
        • Verify your ISO image
        • Choose the right edition
        • Boot Linux Mint
        • Create the bootable media
        • Install Linux Mint
        • Hardware drivers
        • Language support
        • EFI
        • Multimedia codecs
        • System snapshots
        • Pre-installing Linux Mint (OEM Installation)
        • Where to find help
        • Boot options
        • Partitioning
        • Multi-boot
      • User Guide
        • Grub Boot Menu
        • Snap Store
        • Chromium
        • Bluetooth
        • Windows ISOs and multiboot USB
        • How to upgrade to Linux Mint 20
        • Edge ISO Images
        • Lost Password
        • Upgrades
        • Printers and Scanners
        • How to upgrade to Linux Mint 21
      • Troubleshooting Guide
        • Expectation
        • Responsibility
        • Change
        • Reproducibility
        • Observation
        • Environment
        • What
        • When
        • Why
        • Errors
        • Where
        • How
      • Translation Guide
        • Using Launchpad
        • Verify your translations
        • Localization
      • Developer Guide
        • Getting Started
          • Setup
          • Technology
        • Mint Tools
        • Cinnamon
        • XApps
        • Development
          • Daily Builds
          • Coding Guidelines
          • Optimizing JS with Cinnamon
          • Building
    • Kali Linux
      • Installation
        • Installing Kali Linux
        • Bare-bones Kali
        • Installing Kali on Mac Hardware
        • Dual Booting Kali with Linux
        • Making a Kali Bootable USB Drive
        • Dual Booting Kali with macOS/OS X
        • Dual Booting Kali with Windows
        • BTRFS Install (Kali Unkaputtbar)
        • Deploying Kali over Network PXE/iPXE Install
      • Virtualization
        • Running Kali Linux as a Virtual Machine in Windows
        • Installing VMware on Apple Silicon (M1/M2) Macs (Host)
        • Customizing a Kali Vagrant Vagrantfile
        • Kali inside Proxmox (Guest VM)
        • Installing VMware on Kali (Host)
        • Installing VirtualBox on Kali (Host)
        • Import Pre-Made Kali VMware VM
        • Kali inside Parallels (Guest VM)
        • Kali inside Vagrant (Guest VM)
        • Kali inside VMware (Guest VM)
        • Kali inside VirtualBox (Guest VM)
        • Import Pre-Made Kali VirtualBox VM
        • Kali inside Hyper-V (Guest VM)
        • Kali inside UTM (Guest VM)
        • Kali inside QEMU/LibVirt with virt-manager (Guest VM)
        • Improving Virtual Machine Performance for VMware
        • Installing VMware Tools (Guest Tools)
        • Installing VirtualBox Guest Addition (Guest Tools)
        • Installing Hyper-V Enhanced Session Mode (Guest Tools)
        • Converting VMX to an OVA
      • USB
        • Making a Kali Bootable USB Drive (Linux)
        • Making a Kali Bootable USB Drive (macOS/OS X)
        • Updating Kali Linux on USB
        • Making a Kali Bootable USB Drive on Windows
        • Standalone Kali Linux 2021.4 Installation on a USB Drive, Fully Encrypted
        • Adding Persistence to a Kali Linux Live USB Drive
        • Adding Encrypted Persistence to a Kali Linux Live USB Drive
        • USB Boot in VirtualBox
        • USB Boot in VMware
      • Kali On ARM
        • BeagleBone Black
        • Acer Tegra Chromebook 13" (Nyan)
        • ASUS Chromebook Flip (Veyron)
        • Banana Pro
        • Banana Pi
        • CubieBoard2
        • CuBox-i4Pro
        • CubieTruck (CubieBoard3)
        • Gateworks Newport
        • CuBox
        • Gateworks Ventana
        • NanoPi NEO Plus2
        • NanoPi2
        • Mini-X
        • NanoPC-T3
        • ODROID-C0/C1/C1+
        • ODROID-XU3
        • ODROID-U2/U3
        • ODROID-C2
        • Pinebook
      • Containers
        • Kali Linux LXC/LXD Images
        • Official Kali Linux Docker Images
        • Installing Docker on Kali Linux
        • Using Kali Linux Docker Images
        • Using Kali Linux Podman Images
      • WSL
        • Win-KeX SL
        • Win-KeX ESM
        • Preparing a system for WSL
        • Win-KeX
        • Win-KeX Win
      • Cloud
        • Digital Ocean
        • AWS
        • Azure
        • Linode
      • Kali NetHunter
        • Installing NetHunter On the OnePlus 7
        • Installing NetHunter On the Gemini PDA
        • Installing NetHunter
        • Installing NetHunter On the TicWatch Pro 3
        • Installing NetHunter On the TicWatch Pro
        • NetHunter Application - Terminal
        • NetHunter BadUSB Attack
        • NetHunter Bluetooth-Arsenal
        • NetHunter Chroot Manager
        • NetHunter Components
        • NetHunter Custom Commands
        • NetHunter Home Screen
        • NetHunter DuckHunter Attacks
        • NetHunter HID Keyboard Attacks
        • NetHunter Exploit Database SearchSploit
        • NetHunter Kali Services
        • NetHunter MAC Changer
        • NetHunter MANA Evil Access Point
        • NetHunter Man In The Middle Framework
        • NetHunter KeX Manager
      • Tools
        • Installing Tor Browser on Kali Linux
        • Kali Tools
        • Installing snapd on Kali Linux
        • Metasploit Framework
        • Installing Flatpak on Kali Linux
        • Submitting tools to Kali
        • Removed Tools From Kali
      • Troubleshooting
        • Discovering Problems With Download Speed
        • Common Cloud Based Setup Information
        • The Basics of Troubleshooting
        • Troubleshooting Installations Failures
        • Troubleshooting Wireless Drivers
        • Minimum Install Setup Information
      • Kali Development
        • Contributing run-time tests with autopkgtest
        • Custom CuBox Image
        • Custom Beaglebone Black Image
        • Custom EfikaMX Image
        • Custom Chromebook Image
        • Custom MK/SS808 Image
        • Custom Raspberry Pi Image
        • Custom ODROID X2 U2 Image
        • Setting up a system for packaging
        • Intermediate packaging step-by-step example
        • Introduction to packaging step-by-step example
        • Getting the best out of the Kali Bot
        • Advanced Packaging Step-By-Step Example (FinalRecon & Python-icmplib)
        • Generate an Updated Kali ISO
        • Creating A Custom Kali ISO
        • Building Custom Kali ISOs
        • Rebuilding a Source Package
        • Recompiling the Kali Linux Kernel
        • ARM Build Scripts
        • Preparing a Kali Linux ARM chroot
    • Arch Linux
      • Installation Guide
      • Frequently Asked Questions
      • General Recommendations
      • Applications
        • Office & Docs
        • Internet
        • Multimedia
        • Science
        • Security
        • Utilities
        • Others
      • Arch compared to other distributions
    • NetBSD
      • Calls and Errors
      • Libraries
      • Lua Modules
      • Devices and Drivers
  • Law, Policy, and Ethics
    • Fair Use
    • DMCA
      • 🗄️Notable Cases
        • MGM Studios Inc. v. Grokster, Ltd.
        • Viacom International, Inc v YouTube, Inc
        • Capitol Records, Inc. v. Thomas-Rasset
        • Perfect 10, Inc. v. Amazon.com
        • Recording Industry Association of America (RIAA) v. Diamond Multimedia Systems, Inc.
        • A&M Records, Inc. v. Napster, Inc.
        • BMG Music v. Gonzalez
        • Sony Computer Entertainment America (SCEA) v. Connectix Corp.
        • Columbia Pictures Industries, Inc. v. Fung
        • Warner Bros. Entertainment Inc. v. RDR Books
        • BMG Music v. John Doe
        • Universal Music Group v. Veoh Networks, Inc.
        • Universal Music Group v. MySpace, Inc.
        • UMG Recordings, Inc. v. MP3.com, Inc.
        • Cartoon Network LP v. CSC Holdings, Inc.
        • Metro-Goldwyn-Mayer Studios Inc. v. Grokster, Ltd.
        • Viacom International Inc. v. Google Inc.
        • Tiffany (NJ) Inc. v. eBay Inc.
        • Perfect 10, Inc. v. Visa International Service Association
        • Universal City Studios Productions LLLP v. Reimerdes
        • Recording Industry Association of America (RIAA) v. Lime Group LLC
        • Sony BMG Music Entertainment v. Tenenbaum
        • Viacom International Inc. v. Time Warner Cable Inc.
        • UMG Recordings, Inc. v. Shelter Capital Partners LLC
        • Sony Computer Entertainment America Inc. v. Bleem LLC
        • Universal City Studios, Inc. v. Corley
        • Ticketmaster Corp. v. Tickets.com, Inc.
        • Authors Guild, Inc. v. Google, Inc.
        • Perfect 10, Inc. v. Cybernet Ventures, Inc.
        • Tiffany (NJ) Inc. v. Ningbo Beyond Home Textile Co., Ltd.
        • Google Inc. v. American Blind & Wallpaper Factory, Inc.
        • Columbia Pictures Industries, Inc. v. Redd Horne, Inc.
Powered by GitBook
On this page

Was this helpful?

Edit on GitHub
  1. Operating Systems
  2. Kali Linux
  3. Installation

Dual Booting Kali with Windows

PreviousDual Booting Kali with macOS/OS XNextBTRFS Install (Kali Unkaputtbar)

Last updated 2 years ago

Was this helpful?

Installing Kali Linux next to a Windows installation has its benefits. However, you need to exercise caution during the setup process. First, make sure that you’ve backed up any important data on your Windows installation. Since you’ll be modifying your hard drive, you’ll want to store this backup on external media. Once you’ve completed the backup, we recommend you peruse our Kali Linux Hard Disk install guide, which explains the normal procedure for a basic Kali Linux install.

In our example, we will be installing Kali Linux alongside an installation of Windows (10), which is currently taking up 100% of the disk space in our computer. We will start by resizing our current Windows partition to occupy less space and then proceed to install Kali Linux in the newly-created empty partition.

Installation Prerequisites

This guide will make the following assumptions:

  • You have read our single boot Kali Linux install guide, as this has the same Installation Prerequisites (System requirements & setup assumptions).

  • When , , rather than the installer option.

  • A single disk to install to (rather than a dedicated disk per operating system).


We need to use a different image from the single boot Kali Linux install guide, as we need the live image. This is because we need to edit the disk structure without mounting any partitions (otherwise they would be in-use). After we have finished altering the disk layout, we can still install Kali Linux using the live image, but there will be a few differences such as:

  • Changing or removing the .

  • Installing or removing any .

Both of these can be addressed post installation, as it saves swapping to the installer image (as you will need either multiple CD/DVD/USBs or to re-image half way though).

This installation has the potential to go wrong very easily as it involves editing existing partitions. Be aware of what partitions you are modifying and where you are installing Kali Linux to. Having a backup of your Linux files available is a good idea in the event something goes wrong.

Resize Windows Procedure

Before we can install Kali Linux, there needs to be room on the hard disk. By booting into a live Kali Linux session with your chosen installation medium, we can resize the partition to our desired size, as the disk will not be in use because Kali Linux will all be in memory.

  1. Before Resizing the disk, Make Sure Fast Startup is turned off in Windows 10 so that we don’t get an error while resizing the partition. If you don’t know how to do that:- Open Control Panel > Hardware and Sound > Power Options > On the left, click Choose what the power buttons do > Then at the top, click Change Settings that are currently unavailable (This will ask for administrator permissions) > Now Unselect the Turn on fast startup option and click Save Changes at the bottom. Now you are ready to resize the partition.

  2. To start resizing, make sure you insert your Kali Linux installation medium and power on the device. If needed, press any keyboard shortcuts for a “boot order menu” (depends on each manufacture) or boot into BIOS/UEFI and change the boot order to point to the installation medium first.

  3. When the boot menu/options appears, you should see at least one new option. Depending on the manufacture, hardware, how the system is configured and install medium, you may see more options (e.g. Can you boot into non-UEFI?).

You may need to try a few different options in order to find success.

You may need to disable secure boot

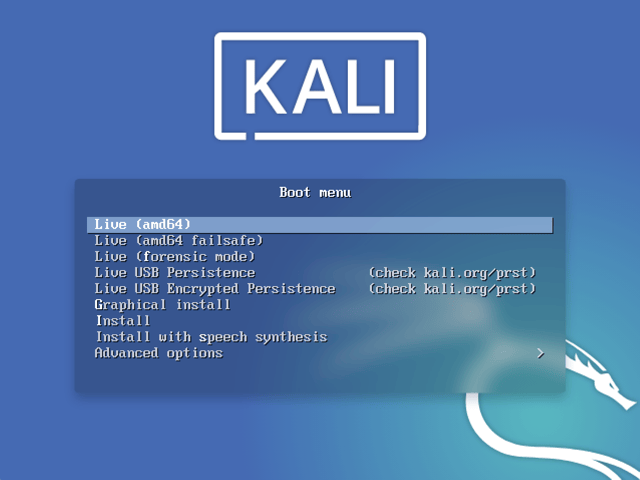
  1. You should be greeted with the Kali Linux boot screen. Select Live, and you should be booted into the Kali Linux default desktop.
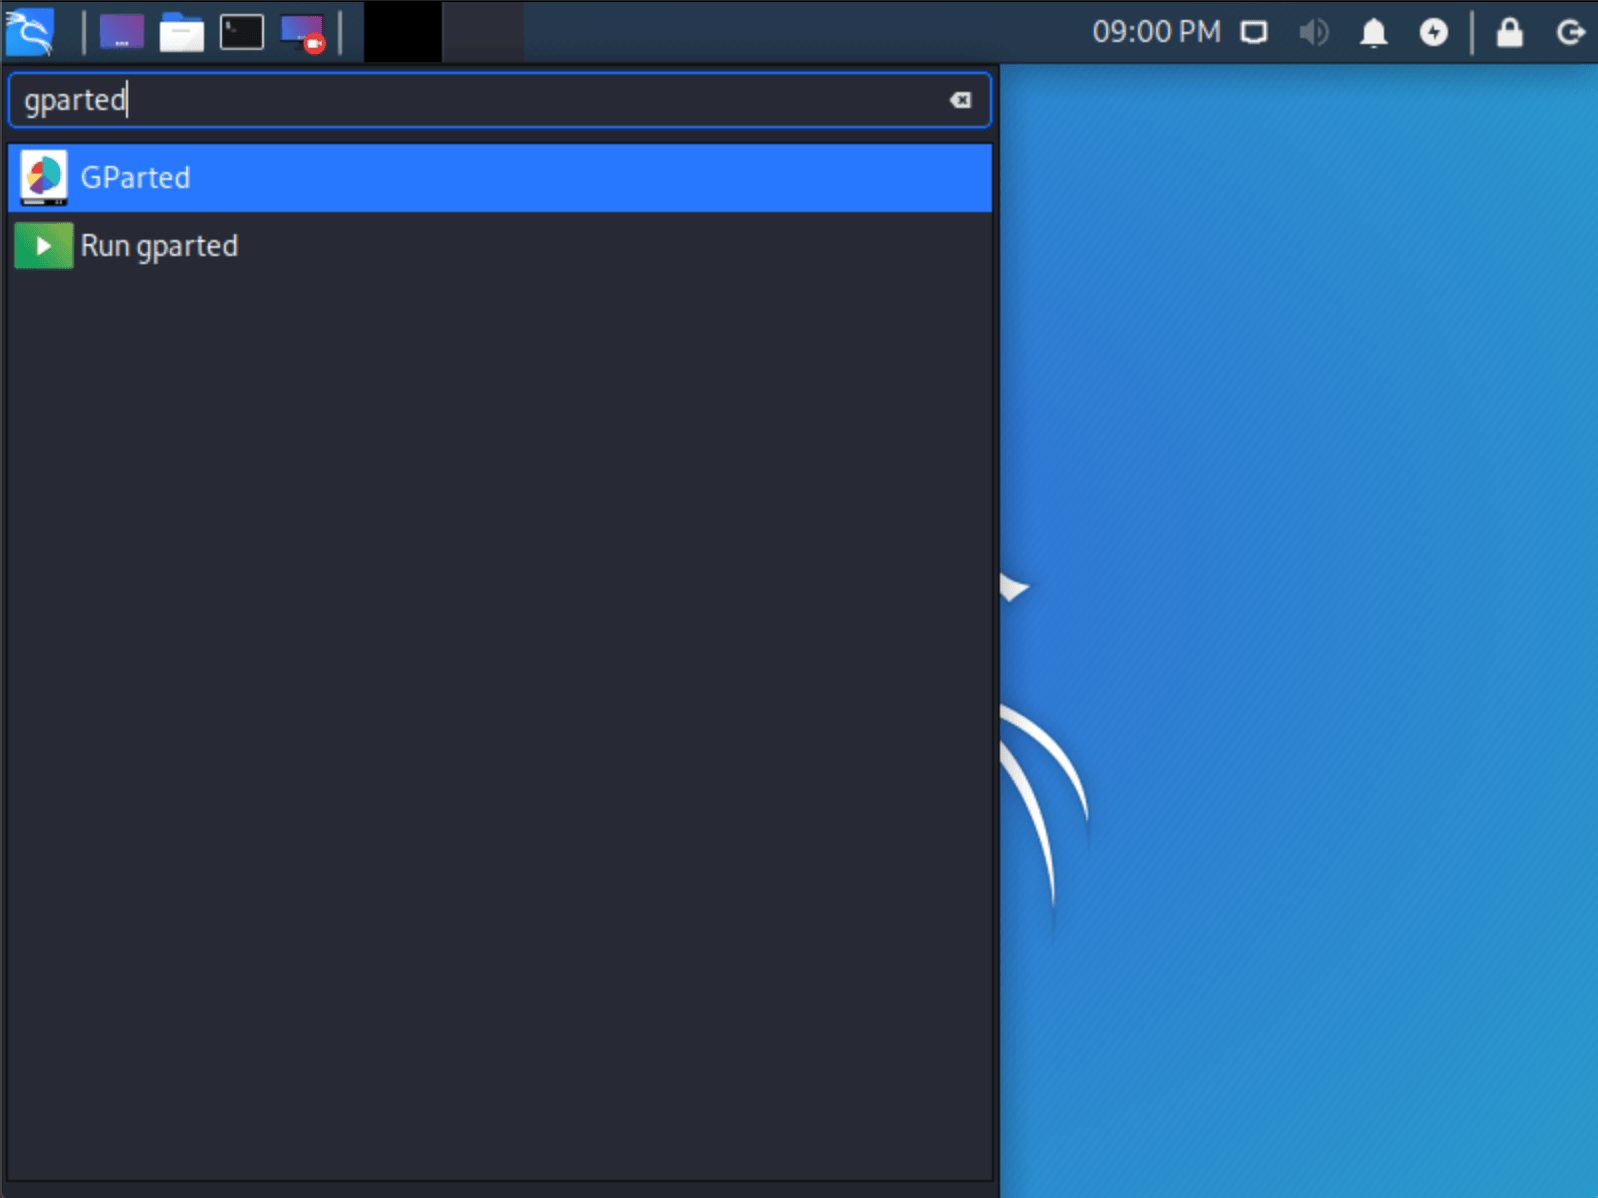


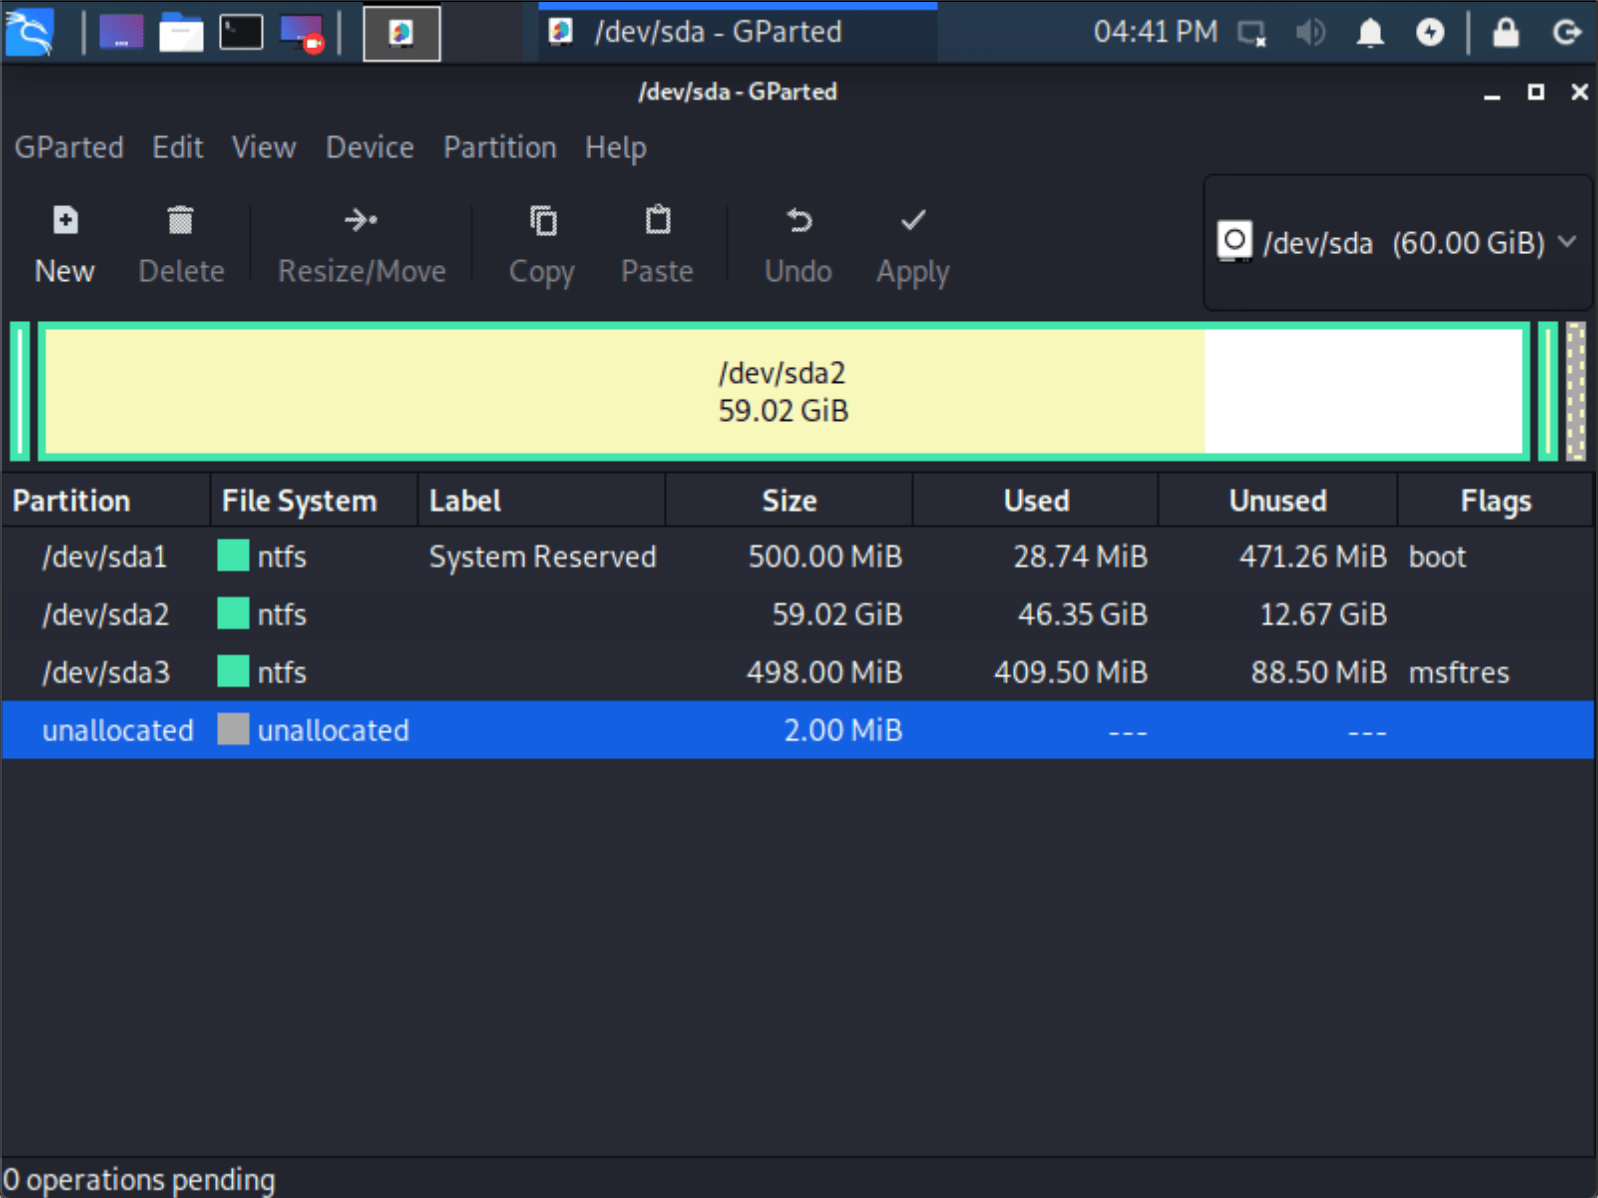
  1. Once GParted has opened, select your Windows partition (/dev/sda2) & resize it leaving enough space (we recommend at least 20 GB) for the Kali Linux installation.

Depending on your setup, it is often the second option (the largest partition). In our example, there are three partitions:

  • Window’s boot partition (/dev/sda1)

  • Window’s main operating system itself (/dev/sda2)

  • Window’s System Recovery partition (/dev/sda3)

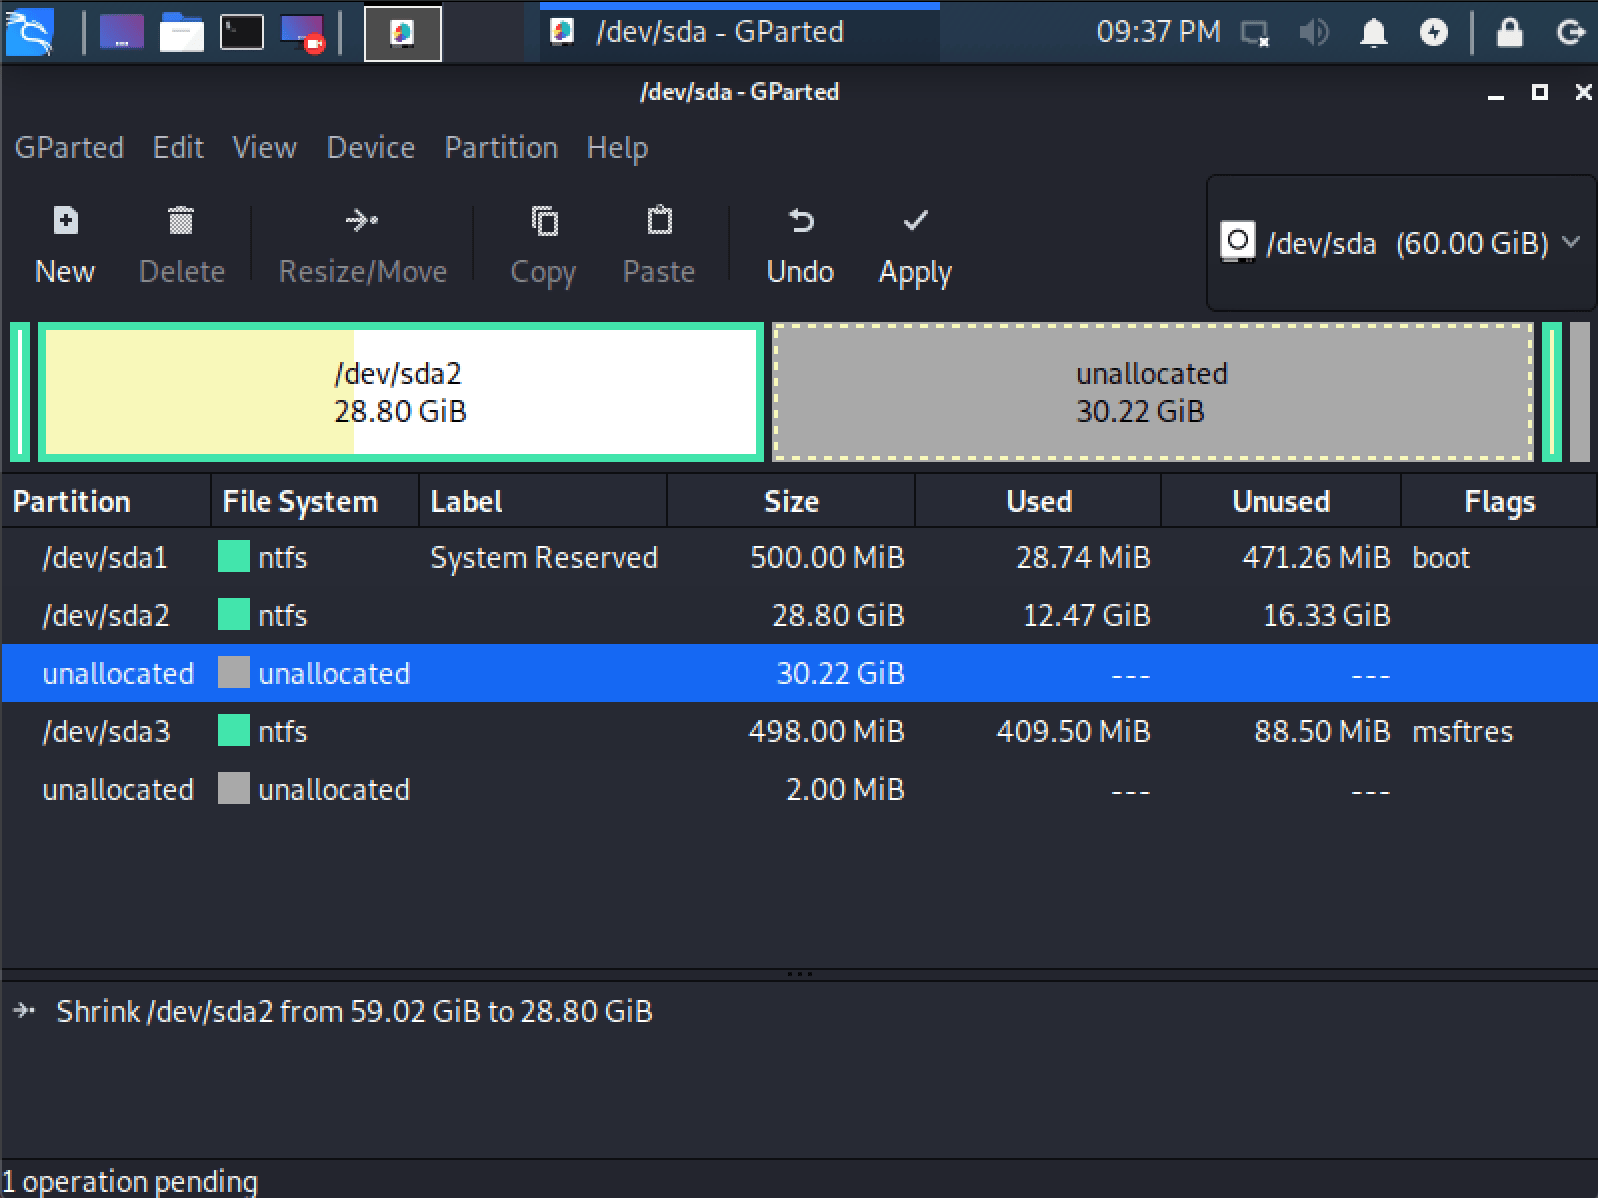
If you are moving past into any non-white in the partition then you are editing a section that is in use. Only remove from the area of the partition that is not in use. It is normal to leave the third partition (/dev/sda3), and only shrink the actual install (/dev/sda2).

If you wish to organize the partition to group all the Windows partitions together, placing the free space at the end, you may do so.


  1. Once you have resized your Windows partition, ensure you “Apply All Operations” on the hard disk. Exit gparted and reboot.

Kali Linux Installation Procedure

  1. The installation procedure from this point onwards is similar to a Kali Linux Hard Disk install, until the point of the partitioning. At this point, you need to select “Guided - use the largest continuous free space” (rather than “Guided - the entire disk”) which got created earlier with gparted.


You should be greeted with a GRUB boot menu, which will allow you to boot either into Kali Linux or Windows.

Post Installation

Now that you’ve completed installing Kali Linux, it’s time to customize your system.

Time/System Clock

One thing that may be worth knowing about is that occasionally the time will get changed between the Windows and the Linux system. To fix this, we can do the following:

:~$ timedatectl set-local-rtc 1 --adjust-system-clock
:~$

To undo this we can simply do:

:~$ timedatectl set-local-rtc 0 --adjust-system-clock
:~$

Now launch , which we’ll use to shrink the existing Windows partition to give us enough room to install Kali Linux in the free space.

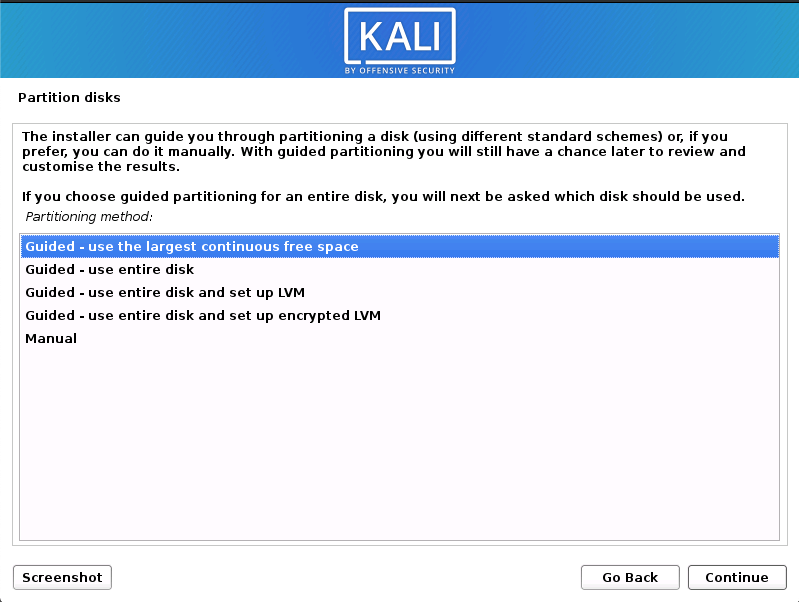
You can carry on following the single boot Kali Linux install guide, except you will not have the option to select or as you are using the live image. Once the installation is done, reboot.
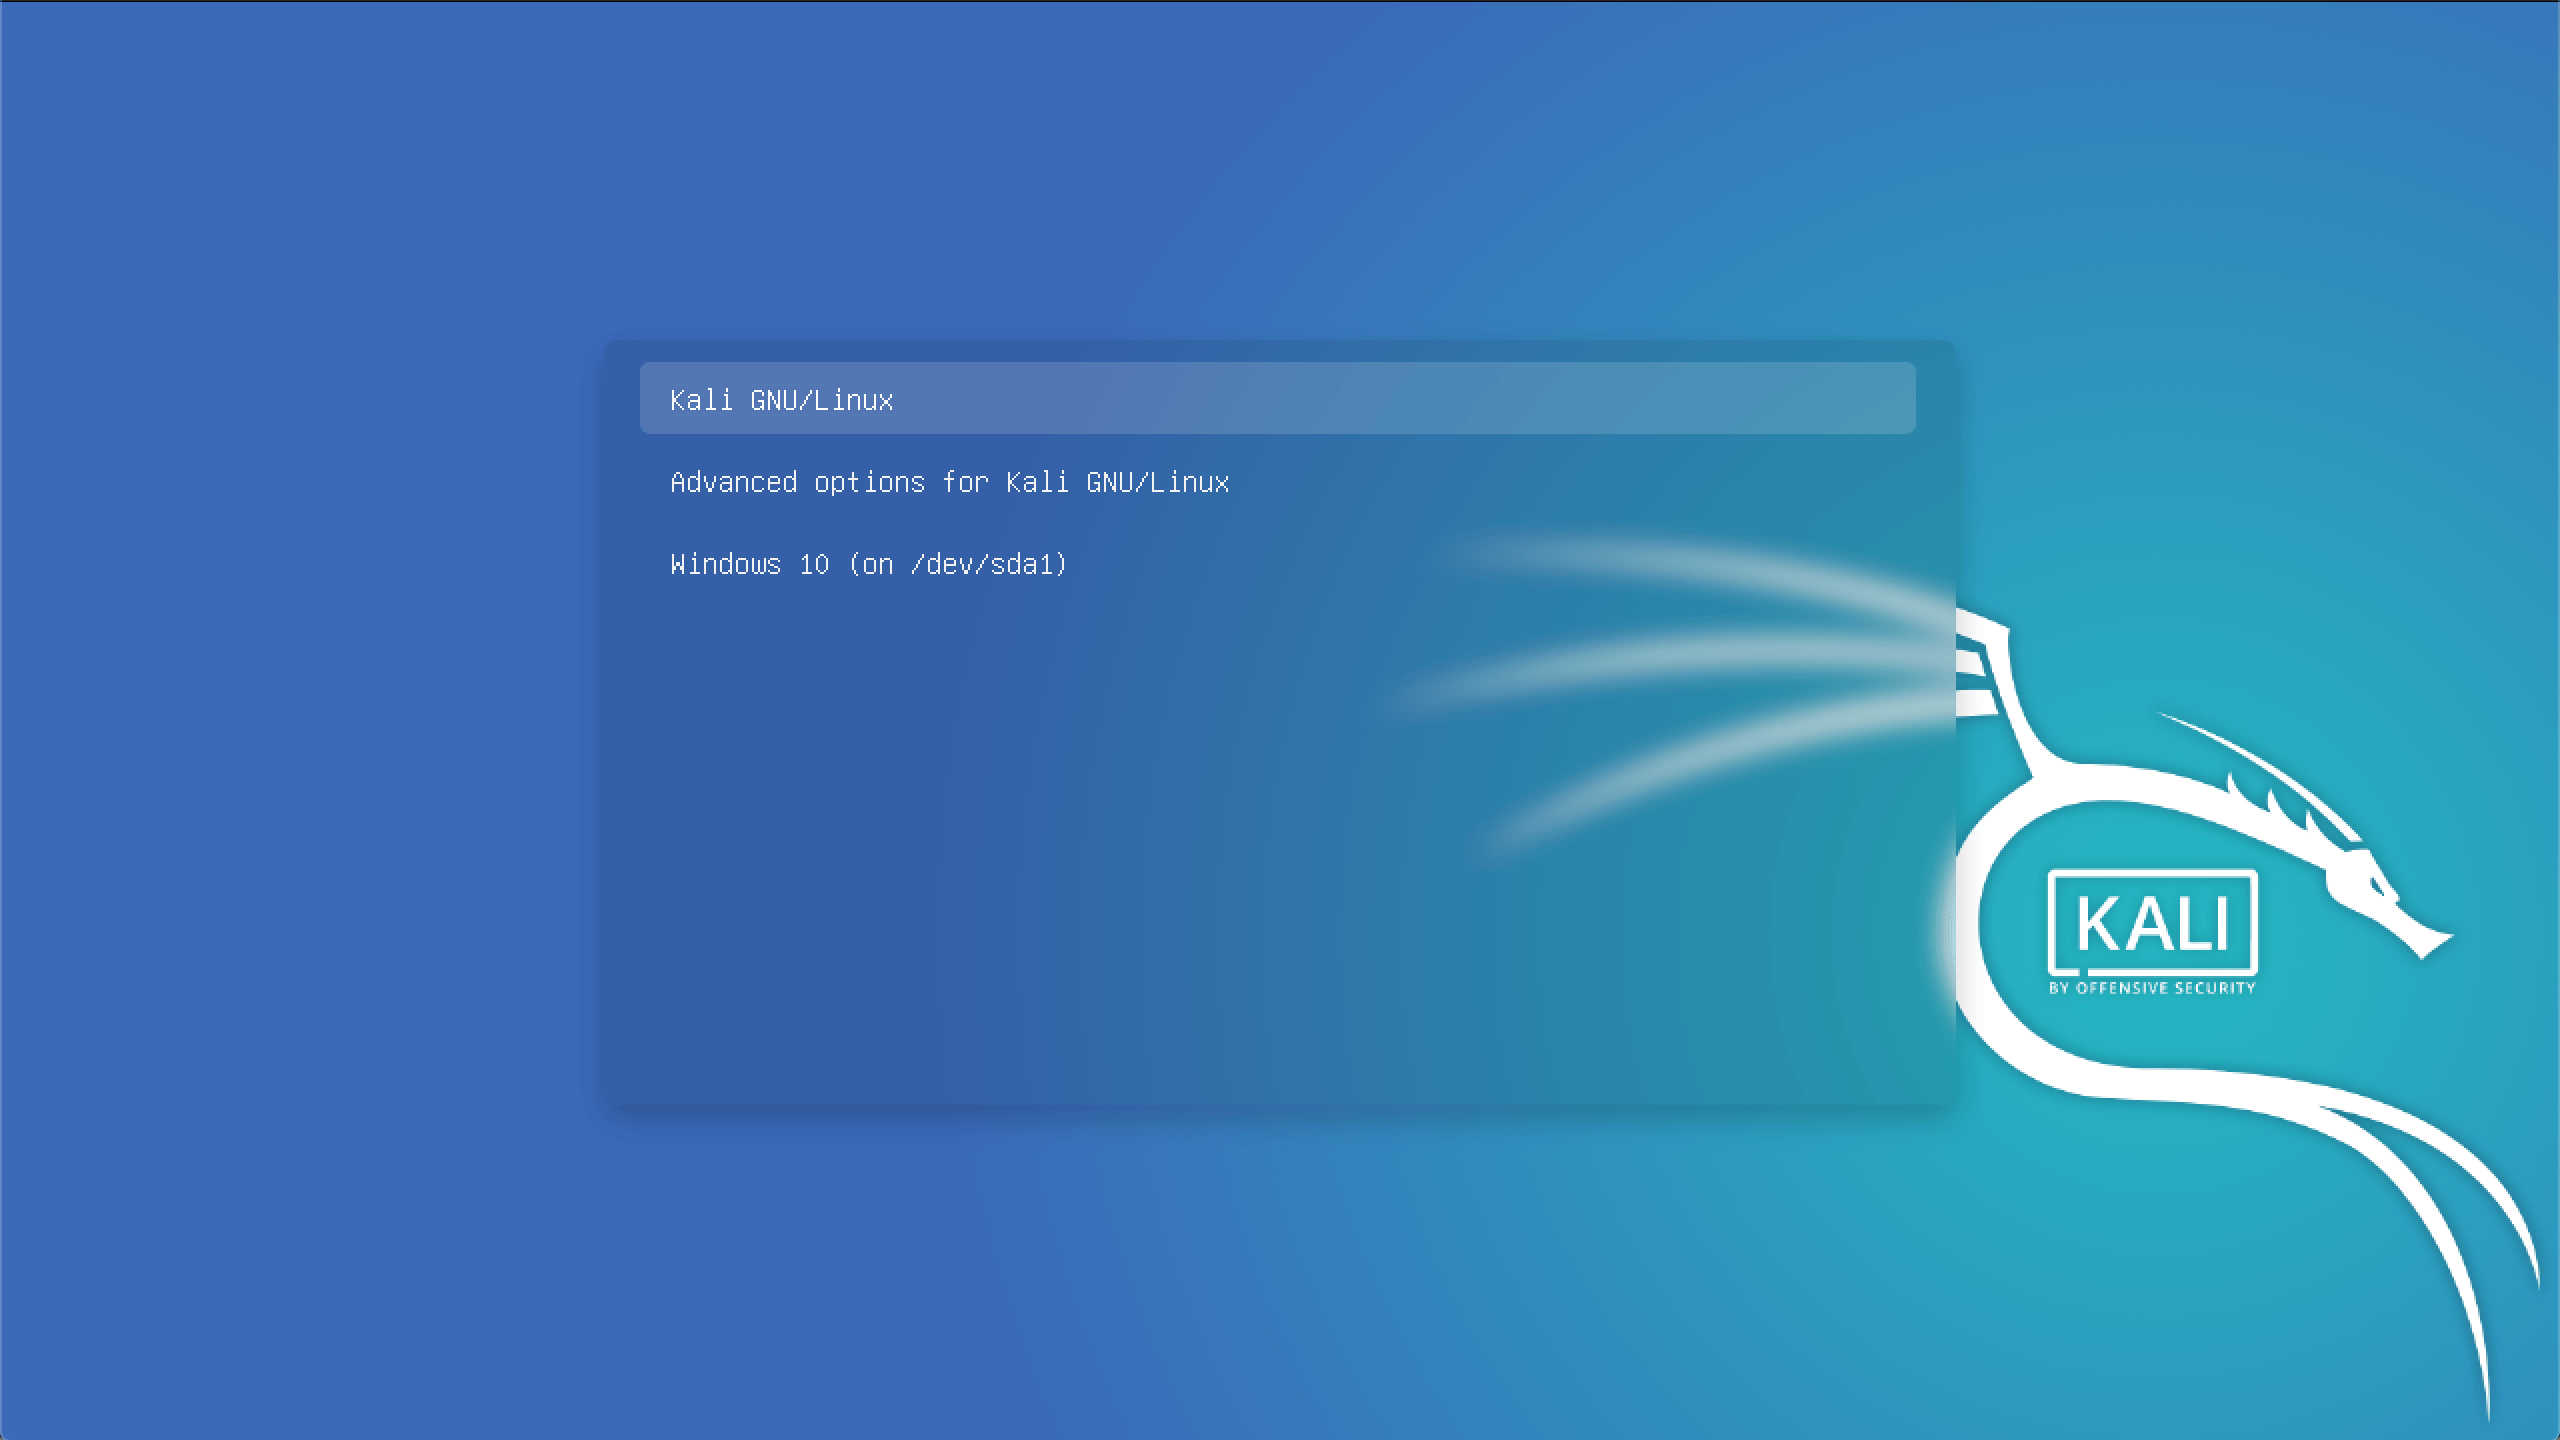
The has more information and you can also find tips on how to get the most out of Kali Linux in our .

downloading Kali Linux
pick the live image
desktop environment
metapackages
GParted
desktop environment
metapackages
General Use section
User Forums